


How to use your own email address
We want to guarantee that each and every email you send through Nusii reaches its destination. By default your proposals are sent from proposal@nusii.com. We understand that you’ll want to use your own email address. However, sending email on behalf of another domain can create deliverability issues. To put it simply, some email providers will regard it as spam.
To bypass this, it’s essential to create a sender domain…
This can seem like a complicated process, but it actually only takes a few minutes. Follow the tutorial below and of course if you have and questions you can contact support@nusii.com
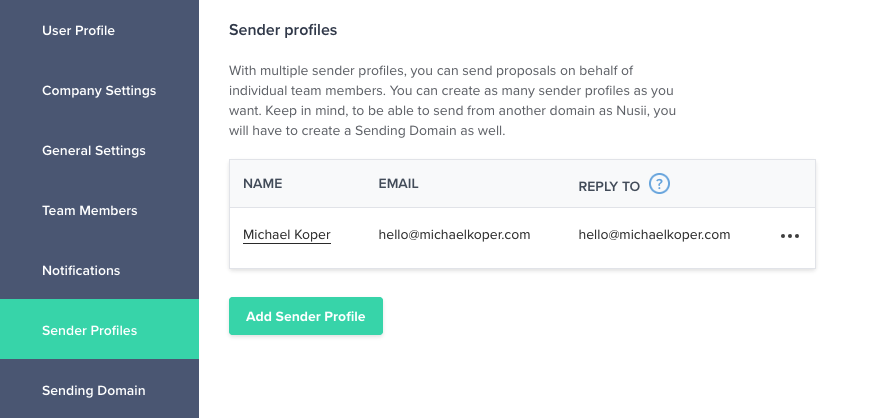
Creating a Sender Profile
With Nusii you can send emails from any email address you own. You can even send proposals on behalf of your colleagues. If you use a public email address (gmail, yahoo, hotmail, etc.) you can set a Reply To email where your client automatically replies to.
To create Sender Profiles go to “Settings” and click on “Sender Profiles”. Click on “Add Sender Profile” and fill in the details
Creating your sending domain
Login to your Nusii account and click on “Settings”, from here select “Sending Domain”. You’ll be presented with the following screen.
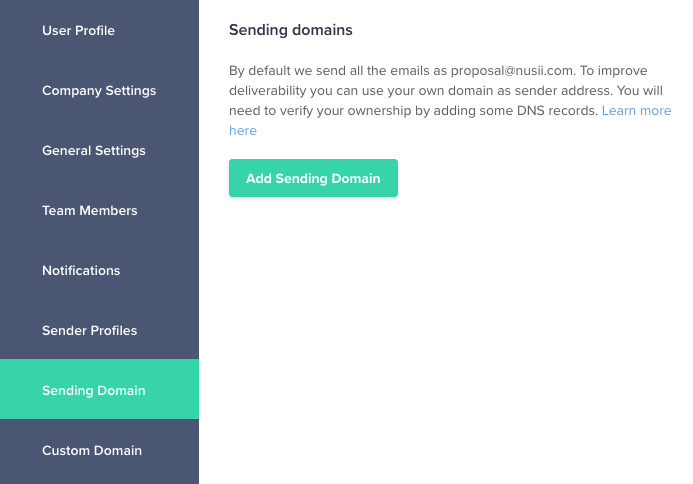
Click the “Add Sending Domain” button and fill out the form.
Updating your DNS settings
Depending on your domain registrar, this next part can vary slightly. If you’re not sure how to proceed, contact your domain registrar or IT department. You can find DNS tutorials from other popular domain registrars below:
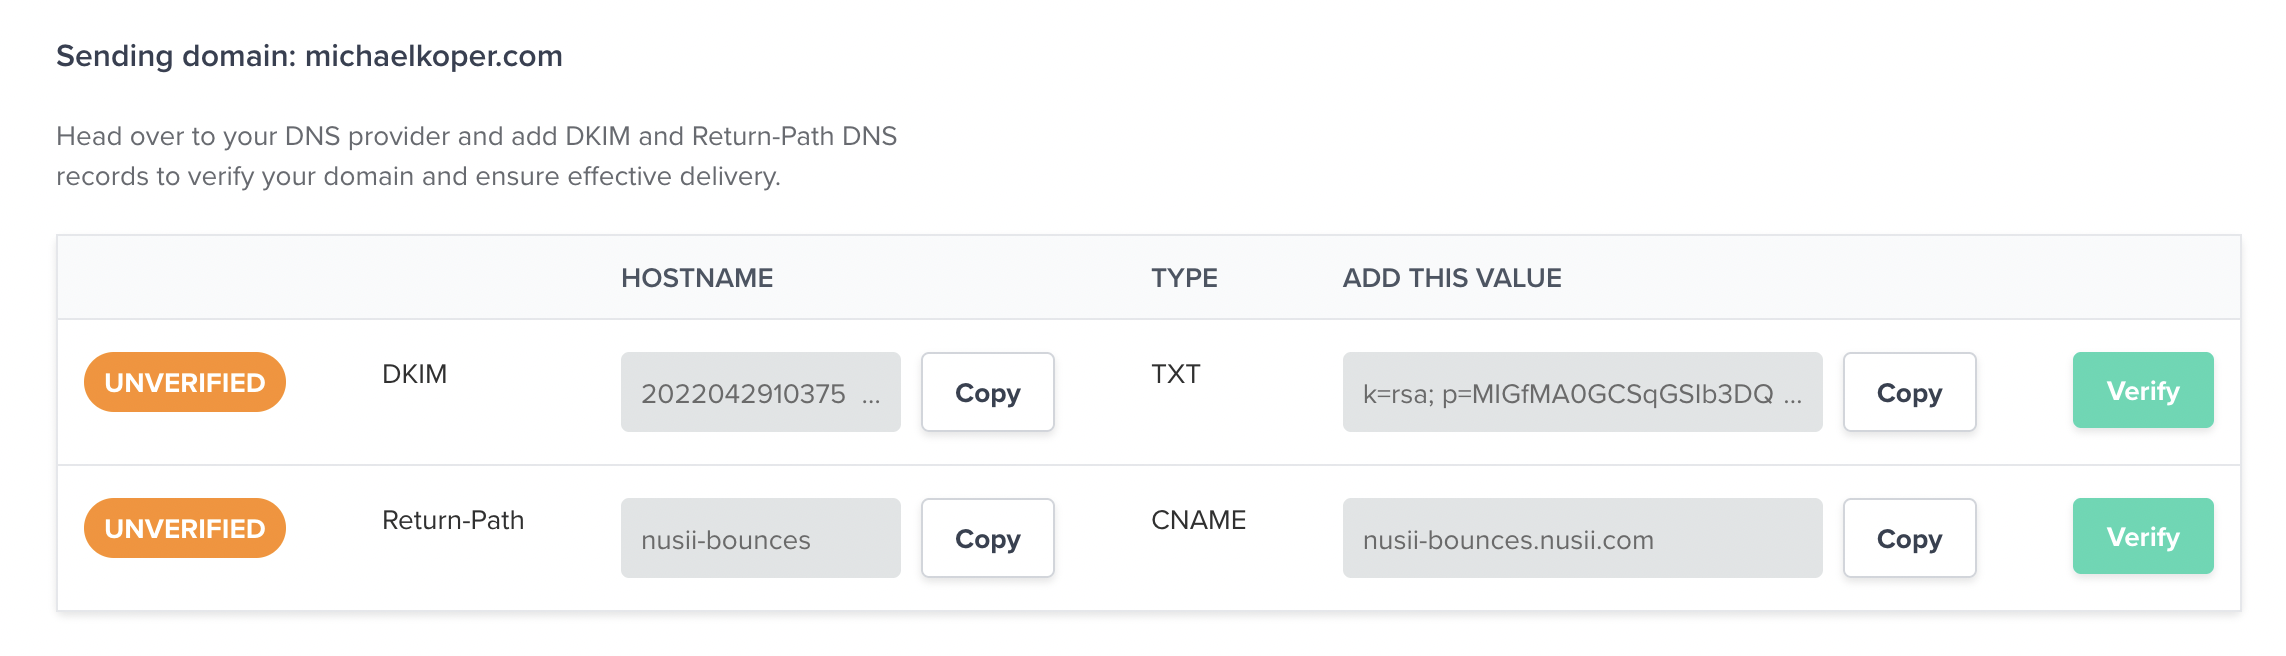
You need to add 2 DNS records, the DKIM and the Return Path (optional). The DKIM is a record to authenticate your domain. The Return Path is a way to let you know when an email is bounced. Setting this DNS improves the but is not mandatory. Keep in mind that the Return Path is a CNAME and not a TXT record.
To update your DNS settings, copy the data you’ll find in the image above and paste it as TXT (CNAME for Return Path) into your hosting’s DNS settings. You can use the copy buttons to copy the values.
Once these changes are made you can click on the “Verify” button. If you see that the DKIM Settings haven’t been verified, don’t worry, it can take up to 24 hours for your host to verify any changes.
Once the changes have been verified you’ll receive an email from Nusii letting you know that you’re ready to start sending emails using your own domain.
Please note, you won’t have to complete the whole process for every team member that you add as your domain will already be verified.
If you have an technical issues it’s best to check with your hosting company or IT department first as they will have a better idea of how your particular DNS settings work.